Showing posts with label DIY thingZ. Show all posts

Saturday, December 15, 2012

Baby Shower deco ideas

Feel like it has been a while since I posted anything on my blog... lol...have been busy moving house and decorate my new apartment. Last weekend, I get to host my dear friend's baby shower.  I had so much fun making all the cute decorations for her baby shower, start with a pink photo booth...


Group photo time!!!


DIY/Pinspired Thank You goodie bag


Its always fun to eat popcorn from a cupcake holder


Yummy treats made by my beautiful girlfriends....


You can't have a baby shower without buntings...


My DIY jars look great as vases


Oh Happy Pinwheels!!!


Gift open time


Sunday, November 4, 2012

Geeky DIY - Floppy Disk

I was cleaning my room the other day and found a bunch of floppy disks... feeling bit crafty and I discovered a new use for them - pen holders!!!

All you need are 5 disks and superglue and you get yourself a brand new pen holder!!!


I used 4 black disks and 1 disk with a different color. If you still have some floppy disks around your house, I guess you can just use what you got, mix-match and superglue different color disks together. Have fun!!! 


Sunday, October 21, 2012

Love earth creatively - Part 2

Inspiration can be found everywhere, it can be some cute Xmas decorations at a shop or just a beautiful painting in an art gallery...


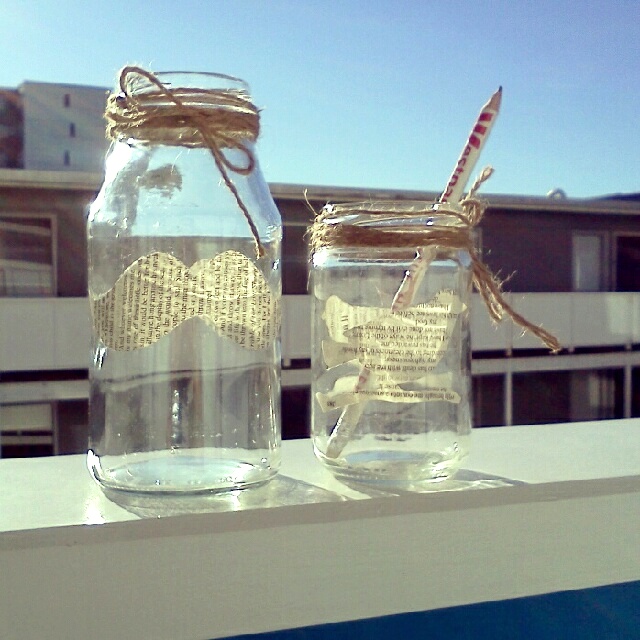
So I was inspired to create some cute DIY jars...

Just image how beautiful your Xmas dinning table will look like with this cute tea-light candle holder... 


We all love buntings at parties, only this time you don't have take the buntings down after the party... Rock your stationery with this cute pen-holder, its like a party on your desk...


Sunday, October 14, 2012

Easy DIY buntings (no sewing)


It was one of my girlfriend's hens night last weekend, of course I was on Decoration & Accessory duties. The theme was "Nautical".  I was so excited for her... and how can we start a party without cool decos? But what if you only have  2 hours to decorate a place from scratch? Here is a good idea just for you: 


What you need:


- Tissue paper ( I got mine from a shop called 2cheap for $1.50 per pack) 
- A pencil and a ruler 
- White strings ( I got mine again from 2cheap, the string is bit wide so you can easily staple the buntings onto it) 
- A pair of scissors 
- A stapler


Step 1:


Start by folding tissue paper into half once, then fold it again in thirds. Use a ruler, measure out your flags, my one is about 7" or 8″—big enough to make a statement. Use a pencil, draw out the shape of your flags. Trace and CUT. 

As I folded my tissue paper into half once, then folded it again in thirds, I got 3 double-sided flags out of every piece of tissue paper.  See how quick and easy that was? Especially when you are under bit time pressure. =D


Step 2:


Once you have them all cut out, simply staple it to the string. Once you've stapled all of them, you're ready to hang it.  All the materials only cost around $10, and it was so simple to make!  I love the mix of dark and light blue colors I was able to bring for the "Nautical" theme... 

And my girlfriend really loved it!!!


Sunday, October 7, 2012

DIY Glitter Sneakers

Glitter is everywhere this season, I fell in love with those funky glitter sneakers I saw at the Shoe Connection the other day...


SO I have done some research on how to DIY glitter sneakers and came up with my own "designer" glitter sneakers on a budget!!! (Around $15) 


What you need:

- Plain white sneakers ( I got my pair from Warehouse for only $7.50...Whoop Whoop!!!)
- Masking tape
- A Paintbrush 
- Silver Glitter
- Mod-Podge Sealer in Gloss finish
- One small plastic plate


Step 1: 

Apply the masking tape over any parts of the shoe that you do not want to paint. Make sure to cover all of the soles.


Step 2:

Stir up the glitter/Mod-Podge mixture in the plastic plate.  You want it to have a somewhat grainy consistency.


Step 3:


Now is the FUN part... Start painting the glitter mixture on the shoe, working from the back of the shoe to the front. You may have to apply 2 or 3 layers until hardly any white space is showing on your sneakers. I applied 3 layers for mine and allow to dry for at least 15min before you add another layer of glitter. 

Step 4:

Paint a light coat of the Mod-Podge all over the glitter to create a seal.  Allow the shoes to dry overnight. 


The next day, its time to get Glitter ON!!!


Sunday, September 30, 2012

DIY Charm Bracelet

Soooo inspired by all the DIY bracelets on the Pinterest, here is my Pinspired version of DIY bracelet...


I was at the Frank Kitts market yesterday after got my favorite coffee at Nikau. And discovered a really cool jewellery store at the market sells funky jewellary, different jewellary threads and cute charms. 

And these are what I got: A meter of blue jewellary making thread and a cute "LOVE" charm for only $3.50.


It looks great when you layered it up with gold bracelet and little bit neon...


Monday, September 24, 2012

Love earth creatively!!!

Hey my favorite peeps in the world, aka my blog reader... 

You properly know I love DIY jars, every DIY jar on this blog is recycled and DIYed with love.  Let's love earth creatively together!!! Here are some my new designs I just wanna share with you...


Saturday, September 1, 2012

Just in case you wondering what do I do with my DIY jars...


You can use it as a pen holder...


Or a beautiful candle light holder...


Oh... and my brand new design, Red Glitter Heart jars. xoxo


Sunday, August 26, 2012

Saturday, August 25, 2012

DIY Jars

Miss Paris??? Bring a piece of Paris home with you...


DIY Eiffel tower jars...


DIY heart jars


Saturday, August 18, 2012

DIY Gemstones necklace

So pumped about Arise conference this weekend and feel like I need to wear something cool/amazing for this awesome conference.

Found some leftover gemstones from my last DIY project and white fabric...glue them together with some fabric glue and my gemstone necklace is born.

It may not seems like this is professionally made, but hey its unique and effective, so why not give a go and have fun with it.


Monday, August 13, 2012

DIY Pom Pom earrings

I just made myself a Pom Pom necklace during the weekend, why not brighten up my day with a pair of Pom Pom earrings?


Rock what you got!!!

you will need:
- 2 x Pom Pom ( any colors you like)
- A pair of earrings you are no longer wearing
- A hot glue gun ( try super glue, I have a feeling it works too)


Glue the pom pom to the earrings and its done!!!


Sunday, August 12, 2012

DIY Pom Pom Necklace

Wanna add bit more color to your outfit? A pom pom necklace might just do the trick. 


Thursday, August 9, 2012

DIY silver earrings

In the spirit of Olympics, We love GOLD,  we also honor SILVER.

So I made myself a pair of silver earrings...=P


Before and After


Tuesday, August 7, 2012

DIY gold earrings

Before and After


Its time to ROCK your look today with bit of glitter drama... 
If you would like a tutorial on this, feel free to leave me a message in the comment box...